My Name Is Rasha – إسمي رشا
My Champagne Taste
Menu
Skip to content
  • Shop
  • Blog
  • Linktree

Tag Archives: gold leaf

My Famous Silver Leaf Dresser

2 / 10 / 183 / 16 / 18

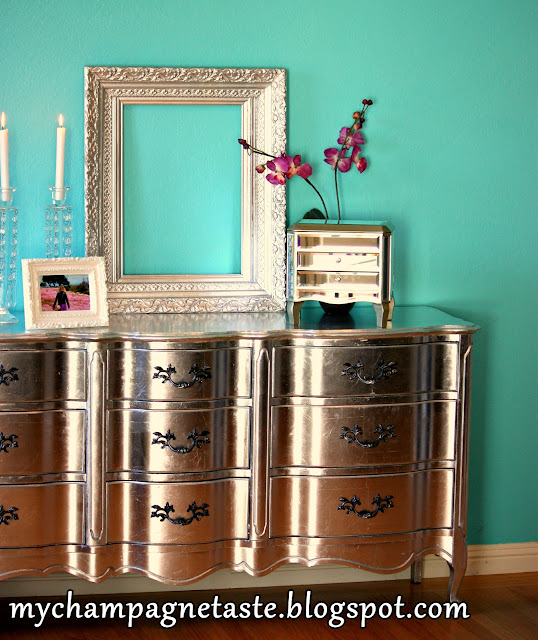
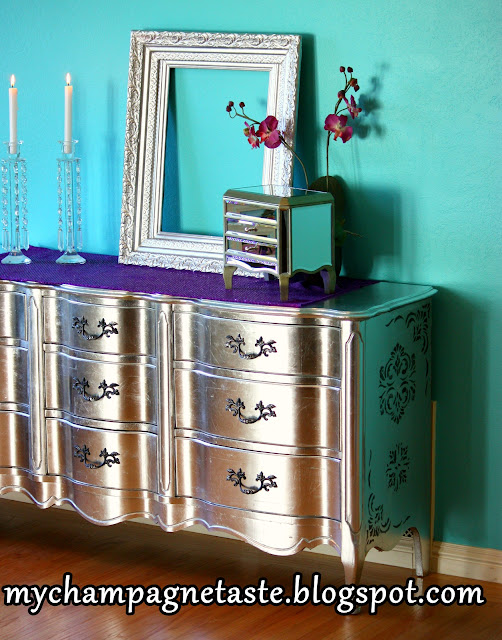
This silver dresser was and still my all time favorite DIY project.

Back in 2012, this silver leaf dresser had so many features and pins from the number one bloggers. With over  130.000 post views I was called Rasha the silver leaf queen LOL.

So why am I rewriting this post today? I’m writing this post after 6 years because I always get questions like:  Does the silver leaf change its color after a while? does it get scratched easily since I didn’t prime it?How did the dresser hold up?

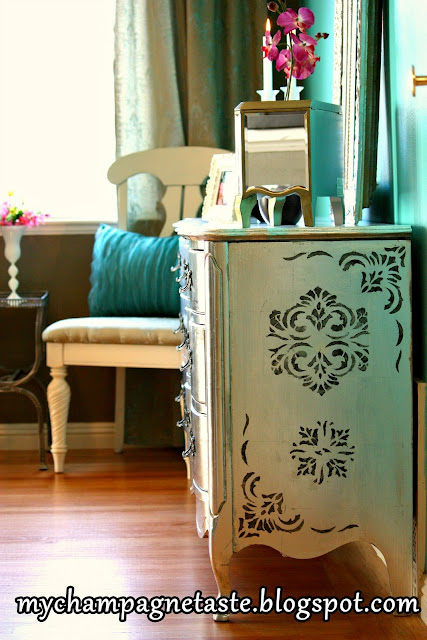
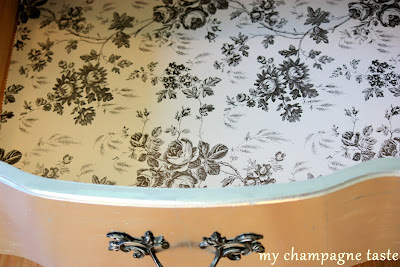
The best way to answer the above questions and many others, I will post the following pictures of the same piece six years after. It is still as beautiful as it was on day 1, it is not scratched, it didn’t change colors. Enjoy the photos.

Read More

5 Comments

– How to Silver leaf furniture.

1 / 7 / 121 / 19 / 18


Simply, I love silver leaf furniture. Perhaps one of the reasons I chose my blog’s name was my admiration for my silver leaf project. After I finished it, the dresser looked so expensive that I thought man I do have champagne taste 🙂

 Silver leafing is easy but you should have a little bit of patience and a vacuum cleaner 🙂 yes yes you heard me a vacuum cleaner because  it will get messy, like really messy,and don’t try to apply it outdoor ( like some blogs suggested) because it is so delicate that your own breath can make a big mess so what about the wind, so I found the best place to apply it is in my workshop garage.

 
So here’s how I did it:
 

1- I applied the oil base size with my dollar store cheap brush, waited for about 45 minutes until the size will get tacky, The proper tack is when the size does not stick to the knuckle and you hear a slight “tick” when the knuckle is pulled away. ( you will know what I’m talking about when you try it).

2-Then you apply the silver leaf by holding it with the wax paper ( the silver leafs come in between of 2 sheets of wax paper so use those papers to hold the silver leaf) so don’t use your own hands because the silver leaf will stick to your hands and not to the desk.

  3- Place the next sheet slightly on top of the previous one, when you overlap the sheets you will get fewer gaps and cracks in between when you burnish them at the end.


4- When you finish applying all the sheets to the desk, use a soft brush to burnish all the silver leaf, and make sure to be gentle on the seams or you will get lots of cracks.


5- Seal it, some blogs says you do not need to seal it but based on my mom experience the color will change after a while if you don’t seal it ( she lives on the beach so it might be weather thing I’m not sure) but I didn’t want to risk it so I sealed it with a transparent sealer ( some sealers has a yellow or red color).

P.S: When you seal it, the checkboard pattern will disappear. 


6-Thanks to centsational girl I knew this tip, you can fill in the cracks with Rub’Buff silver color it works like magic but of course, this should happen before you apply the sealer.


7- Don’t ever think you will get a perfectly smooth surface, no matter how hard you try you will have a textured surface or a few cracks so you better like the mirrored antique style.The perfect silver leaf style is not to be perfect 😉

 
Before:


After:


                                               I’ll tell you a secret, this was my first silver leaf project ever and it wasn’t that easy. I applied 3 times the silver leaf over that dresser.The first time, I didn’t like the way it turned out to be it was like a chessboard. The second time, I applied another layer of silver leaf over the first one so I can break that chessboard pattern but it was a very bad idea, it was all wrinkly so I used my sander and removed both layers. Third and it was the final one and it turned out prettay ( or I gave up and I convinced my self it is pretty lol)


For the small details and curves of the drawers for some reason silver leaf didn’t stick so I applied Rub N Buff, like Kate from Centsationalgirl did  


Hope you like my dresser cause I’m in love with it 🙂


Follow Me on Pinterest

164 Comments

– Silver Leaf Floor Lamp

9 / 9 / 111 / 19 / 18

I just love Bling Bling. Like every little  black dress needs a  jewelry to shine , our  home needs some bling bling to glam it 🙂

One of the accessories that im liking are those shiny , silvery floor lamp shades.
Below is my inspiration from Modani.com

Modani.com

And here is my “wanna be” Modani lamp shade before the transformation with the size on=glue on.


It had a bronzey outdated color so i didnt paint it because it will look good for an antique style silver lamp shade( remember with silver leafing the base color will peek through some of the areas)

I bought the silver leafing, the size and the sealing coat through ebay.


Silver leafing is easy but you should have a little bit of patience and a vaccum cleaner :)yes yes you heard me a vaccum cleaner because  it will get messy, like really messy,and dont try to apply it outdoor ( like some blogs suggested) because it is so delicate that your own breath can make a big mess so what about the wind , so i found the best place to apply it is in my workshop garage.

1-I applied the oil base size with my dollar store cheap brush, waited for about 45 minutes until the size will get tacky , The proper tack is when the size does not stick to the knuckle and you hear a slight “tick” when the knuckle is pulled away.( you will know what i’m talking about when you try it).


2-Then you apply the silver leaf by holding it with the wax paper ( the silver leafs come in between of 2 sheets of wax paper so use those papers to hold the silver leaf)so dont use your  own hands because the silver leaf will stick to your hands and not to the lamp.


3- Place the next sheet slightly on top of the previous one, when you overlap the sheets you will get less gaps and cracks in between when you burnish them at the end.

4- When you finish applying all the sheets on the lamp ,use a soft brush to burnish all the silver leaf , and make sure to be gentle on the seams or you will get lots of cracks.

5- Seal it, some blogs says you do not need to seal it but based on my mom experience the color will change after a while if you dont seal it ( she lives on the beach so it might be weather thing i’m not sure) but i didnt want to risk it so i sealed it with a transparent sealer ( some sealers has a yellow or red color).

6-Thx to centsational girl i knew this tip, you can fill in the cracks with Rub’Buff silver color it works like magic but of course this should happens before you aplly the sealer.

7- Dont ever think you will get a perfect smooth surface , no matter how hard you try you will have a textured surface or a little bit of cracks so you better like the mirrored antique style.The perfect silver leaf style is not to be perfect 😉


I would love to hear you comments or your questions if you have any , i also applied silver leaf on a big dresser check it out here


Liking too : remodelaholic , missmustardseed ,   thriftydecorchick , 
 shabbynest ,  .atthepicketfence ,  funkyjunkinteriors , frenchcountrycottage
 tatertotsandjello ,  lifemadelovely ,  makingtheworldcuter , theshabbycreekcottage ,                 thegirlcreative ,  bec4-beyondthepicketfence , thekurtzcorner , sugarbeecrafts , insidebrucrewlife , bluecricketdesign , lilluna.com , gratefulbelly , thetrendytreehouse , restoreinteriors , theshabbycreekcottage , hekurtzcorner


Leave a comment

Follow us on

  • Youtube
  • Youtube
  • RSS
We will only send you what matters


Recent Posts

  • Walmart Fashion
  • Walmart Fashion Haul – Part 2
  • Walmart Fashion Haul
  • New Years Free Templates
  • Walmart Kitchen Haul

Recent Comments

  • Mai on “Cool” California Summer!!!
  • Shireen on Ramadan Look
  • Yamamah on Ramadan Decoration
  • Lina Froukh on Mini Dress With Over The Knee Boots

Archives

  • December 2022
  • November 2022
  • December 2021
  • October 2021
  • July 2021
  • June 2021
  • September 2019
  • April 2019
  • January 2019
  • December 2018
  • November 2018
  • October 2018
  • September 2018
  • June 2018
  • May 2018
  • April 2018
  • March 2018
  • February 2018
  • January 2018
  • December 2017
  • February 2015
  • November 2014
  • April 2014
  • September 2013
  • October 2012
  • June 2012
  • May 2012
  • April 2012
  • March 2012
  • February 2012
  • January 2012
  • December 2011
  • October 2011
  • September 2011

Categories

  • diy
  • Fashion
  • Home Decor
  • Party
  • Recipes
  • Uncategorized


Follow us on

  • Youtube
  • Youtube
  • RSS
Site made with ♥ by Angie Makes
Angie Makes Feminine WordPress Themes